| Section | ||||||||||||||||
|---|---|---|---|---|---|---|---|---|---|---|---|---|---|---|---|---|
|
Step 1

Click the “Network” button on your taskbar next to the clock or speaker.
Step 2

Click on SU_Student_WPA2 or SU_Staff_WPA2 Open Network and Sharing Center.
Step 3
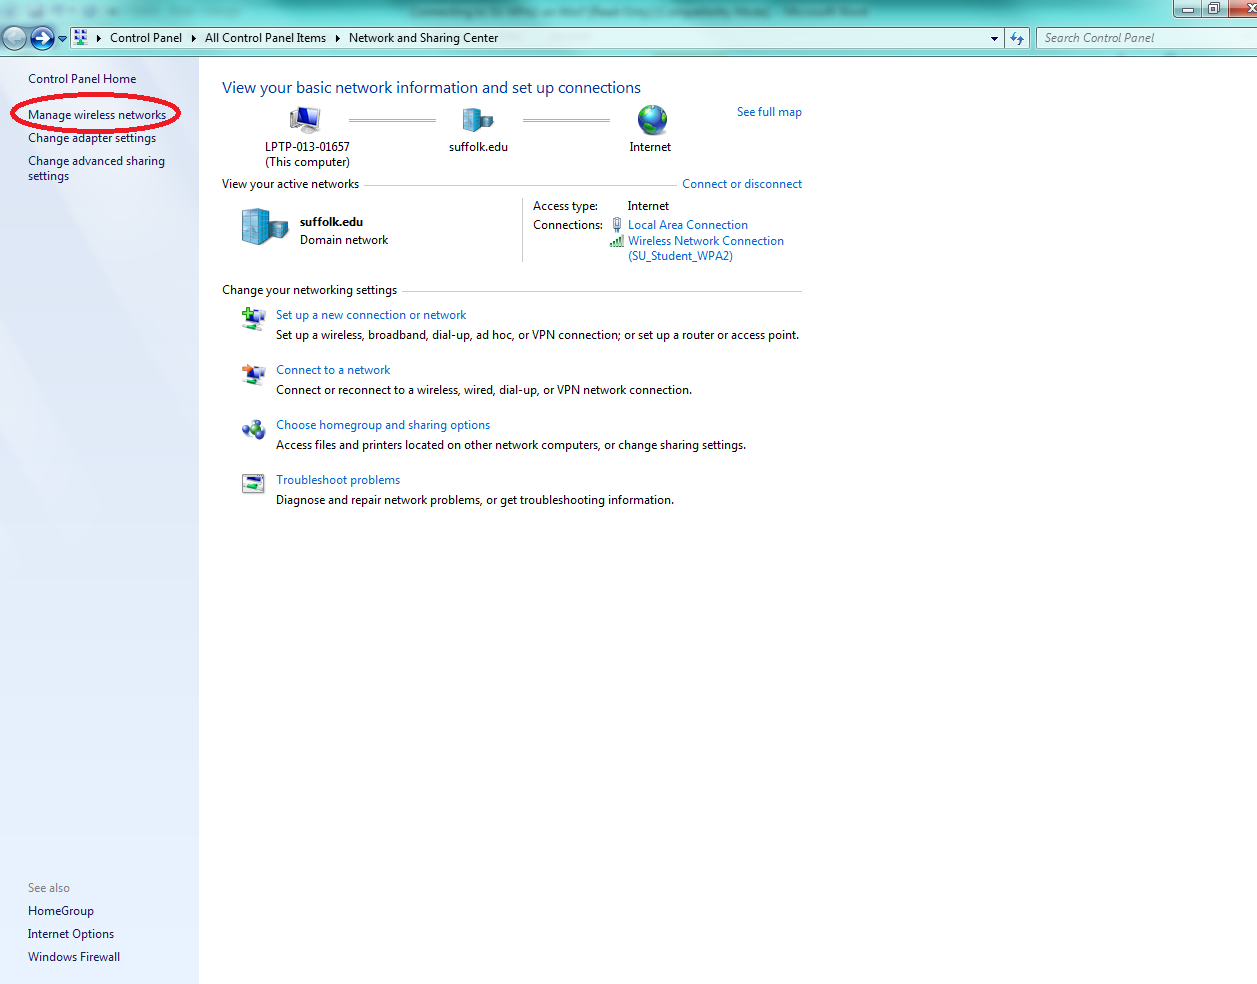
Select Manage wireless networks from the left hand menu.
Step 4

Select Add to create a new network.
Step 5
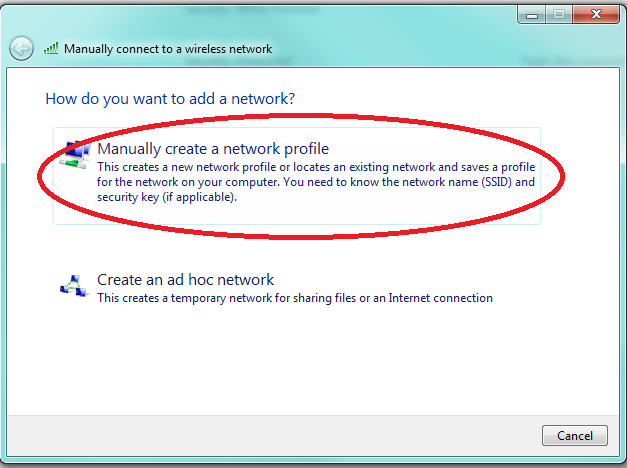
Select Manually create a network profile.
Step 6

Enter either Move cursor over desired network connection SU_Student_WPA2, if you are a student, or SU_Staff_WPA2 and left click get drop down window and right click to select Properties.
Step 4
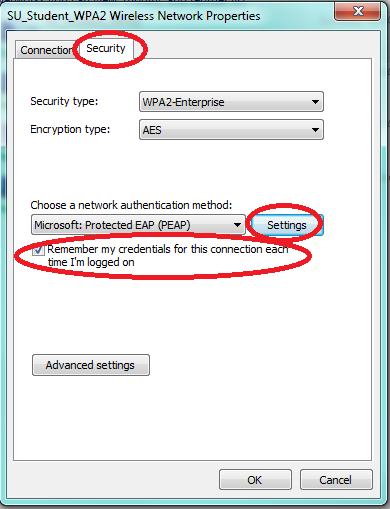
On the Wireless Network Properties window make sure the Security tab is selected, Remember my credentials check box is “checked”. Click on the Settings button.
Step 5
...
WPA2, if you are an employee, into the Network Name Field. Select WPA2-Enterprise from the Security type drop down. Make sure that both check-boxes are filled in at the bottom of the screen and then hit Next.
Step 7

Select or Click on Change connection settings.
Step 8
Click on the Security tab. Make sure the below check-box is checked. Then select Settings.
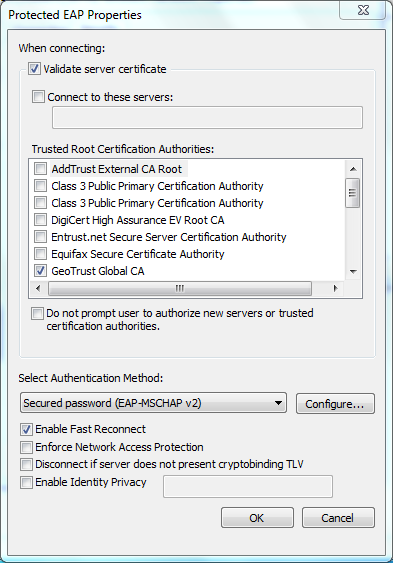
Step 9
On the Protected EAP Properties window, select GeoTrust Global from the list of Trusted Root Certificate Authorities. Then click on Configure button.
Step
...
10
...
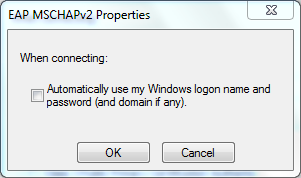
On the EAP MSCHAPv2 Properties make sure that “Automatically use my Windows logon name and password (and domain if any)” check box is Un-checked and click “OK” on all the remaining windows.
Step
...
11
...
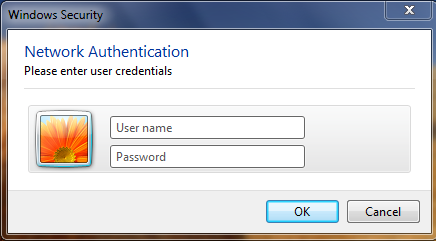
Type in your Suffolk email username (without the @suffolk.edu) and password and hit “OK.”
Step
...
12
...

When the “Windows Security Alert” shows:
...