Exporting a course allows the user to maintain a local copy (on his or her computer hard drive or disk) to backup course material or for future use. Exporting a course will give users the option to save all course content or just specific individual areas of the course, such as announcements, tests, blogs, etc. Student roster information or student activities will not be saved with the exported course.
1. Log into Blackboard and go into the course with the content you wish to save or backup.
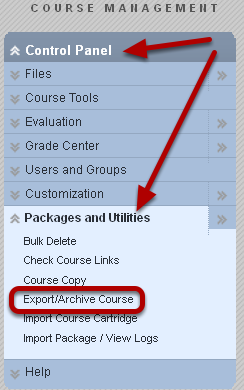
2. Under Control Panel and Packages and Utilities, click Export/Archive Course.
3. Click the Export button

4. Uncheck the Limit Package option

NOTE: Unchecking the "Limit Package" option ensure that you are exporting all the files, not just the links to files.
5. Select the Course Materials You Wish to Export
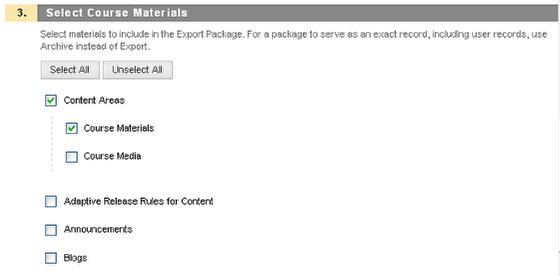
This feature exports all information in the different areas. It does not export only one document, folder, test, etc. This feature exports the entire content area or all of the tests, surveys and polls in that course or area selected. To copy folders and individual documents from one course to another, go to Copy and Move Content in a Course.
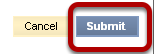
6. Click Submit
At this point, you will need to wait until you receive an email from the Blackboard system administrator informing you that the export is complete.
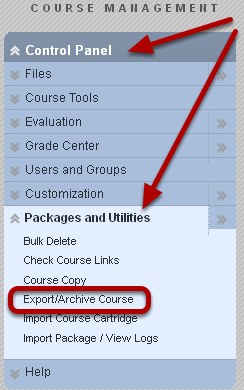
7. Once the email is received, go back to Packages and Utilities> Export/Archive
8. Click on the archive file you will see listed

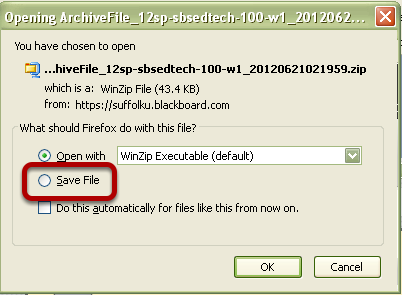
9. Save the file to your hard drive or to another desired location
This exported course can be saved for as long as desired. When ready to import these selected course materials into a different course (a course must already be available in Blackboard), go to Import Course Content.
NOTE: Do not open the zip file, as it can corrupt the file.