The course Menu includes the links to content, Blackboard tool, and external resources.
1. Click the blue plus button on the top left corner of the menu
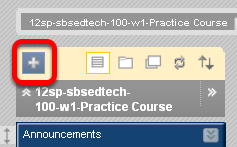
NOTE: Make sure your Edit Mode button is On.
2. To create a Content Area where you will add more content, choose Content Area from the drop down menu

3. Type in a Name for the Content Area, select Availability to students, and click Submit.
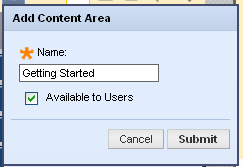
NOTE: Selecting the Available to Users check box allows students to access this Content Area immediately. If you do not select it, students will not be able to access this menu item. To change availability later, open the contextual menu to the right to the item and choose the "Show Link".
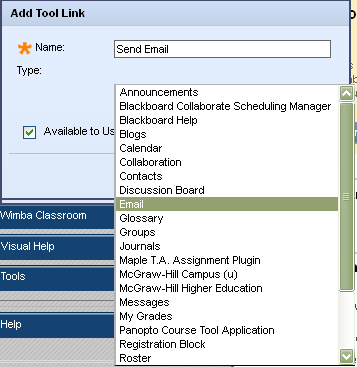
4. To add a new Tool Link, choose Tool Link from the drop down menu
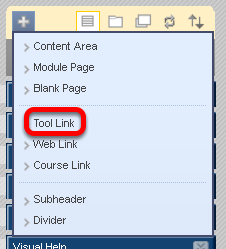
NOTE: If you unsure whether to add a Content Area or a Tool Link, click on the Tools link in the Course Menu. If what you want to add is listed in Tools, then you would add a Tool Link rather than a Content Area.
5a. Name the Tool Link
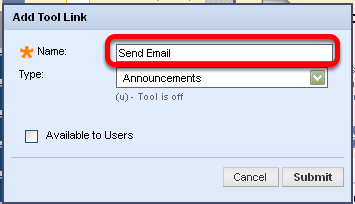
NOTE: You must select the specific tool from the Type field to which you want the menu item linked. You can rename the tool, but the tool to which you have linked will always be the selected tool
5b. Choose the Tool Type from the dropdown menu, select Availability to Users and click Submit.
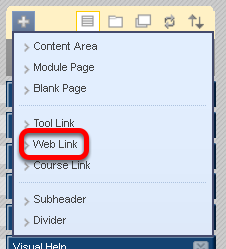
6a. Create a link to an external site by selecting Web Link
6b. Give a name to the Web Link, copy and paste the URL, make it Available to Users, and click Submit
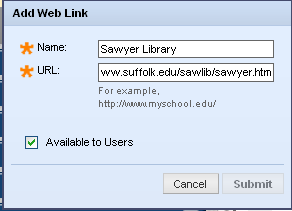
NOTE: You must include the entire URL address, beginning with the http:
7a. To create a direct link to a different part of your course choose Course Link
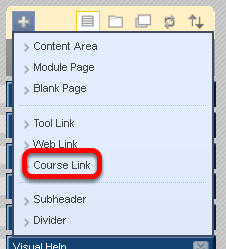
Course links allow you to link to other areas in your course that have already been created. Links can go to areas, folders, and specific items.