| Anchor | ||||
|---|---|---|---|---|
|
This will identify the different components of the Video Feature in Collaborate . The Video feature of Collaborate enables you to transmit and receive video broadcasts with others in a session. This is video you send live via a video camera (e.g., web cam) – not to be confused with a pre-recorded video (movie) that Moderators can play using the Multimedia feature.
Video Components

1 Expand/Collapse button
2 Options menu
3 Primary video display
4 Preview Video button
5 Transmit Video button
1. Use the Expand/Collapse button to reduce the size of the panel
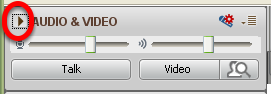
NOTE: Collapsing the Audio/Video Panel is not recommended if you are using video during your class session.
2. View the Options menu

NOTE: Most of the functions that can be accomplished via the Options menu refer to Audio components, but there are a few that are Video-related.
3. Observe the primary Video display
NOTE: You may see the Video transmission or the profile picture (or default profile icon) of the person currently speaking in the primary Video display. The display will also show their name. Whether or not you see this depends on the configuration of the Video display.
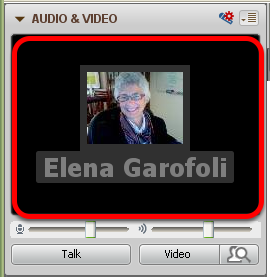
4. Click the Preview Video button

NOTE: Only you can see the Preview image; it is not until you click the actual Video button that you are transmitting Video to the session participants
5. Click the Video button to transmit your video
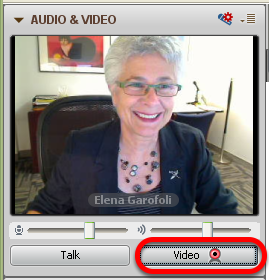
NOTE: You will know someone is transmitting video (has their Transmit Video button turned on) when the blue Video activity indicator (Video Activity Indicator icon) appears next to their name in the Participants list.
| Anchor | ||||
|---|---|---|---|---|
|